Fall Biped 2016- Schedule and Burndown
By: Ijya Karki (Project Manager)
Table of Contents
Introduction
One of the most important documents that the Project manager produces is the schedule. The schedule will pace how your project will progress. The hardest part about preparing the schedule is to know which tasks to give each member and when to have these tasks completed.
Requirement
Creating the schedule correlates to Biped’s requirement: “Shall be ready to participate in the game ‘Save the Human’ on December 14th, 2016.”
Determining Tasks
Tasks should be determined based on the generic year schedule that Professor Hill provides and the work break down schedule that is presented at the beginning of the school year.

Figure 1 Generic Schedule [1]
I determined the various tasks that should be completed by reading the job descriptions [2] and keeping track of the different expectations of each division. Then, I went through what I wrote down and highlighted the tasks that related to what Biped had to accomplish.
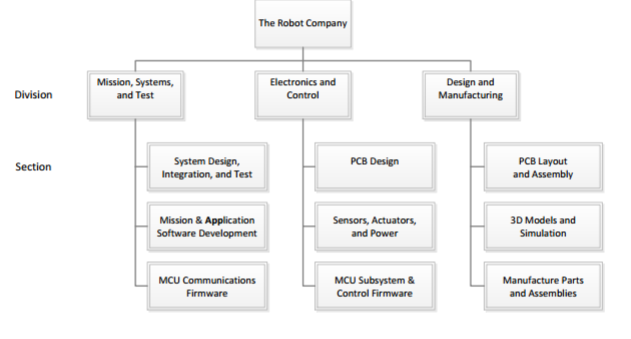
Figure 2 Work Break Down
Project Libre
Download project libre (http://www.projectlibre.com ) to create the schedule based on the work breakdown structure you come up with. Once project libre is opened up, create a name for your project and input the start date of your schedule (the beginning of the semester). Then proceed to fill out the tasks determined above and include due dates based on the generic class schedule.
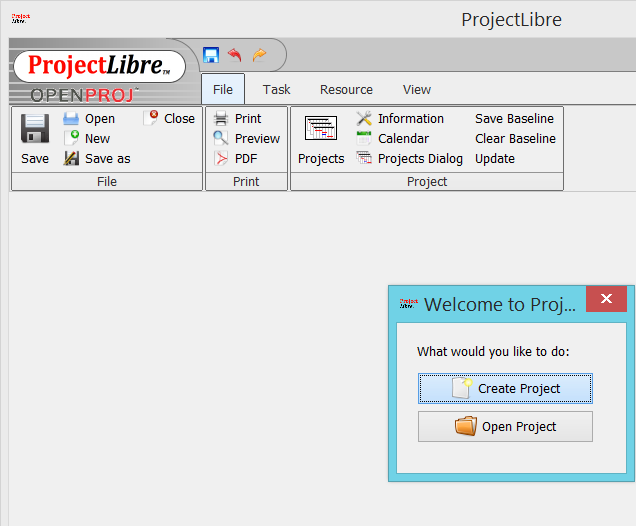
Figure 3 Project Libre Open Screen

Figure 4 Project Libre Task Input
*Note: various tasks can take longer than the ideal time. To compensate for this, make sure to add extra time to each task*
Once a task is completed click the column to the immediate right of the number column to mark the task as finished. This can be accomplished by marking a 100% for completion.

Figure 5 Completed Task on Project Libre
Biped’s Schedule
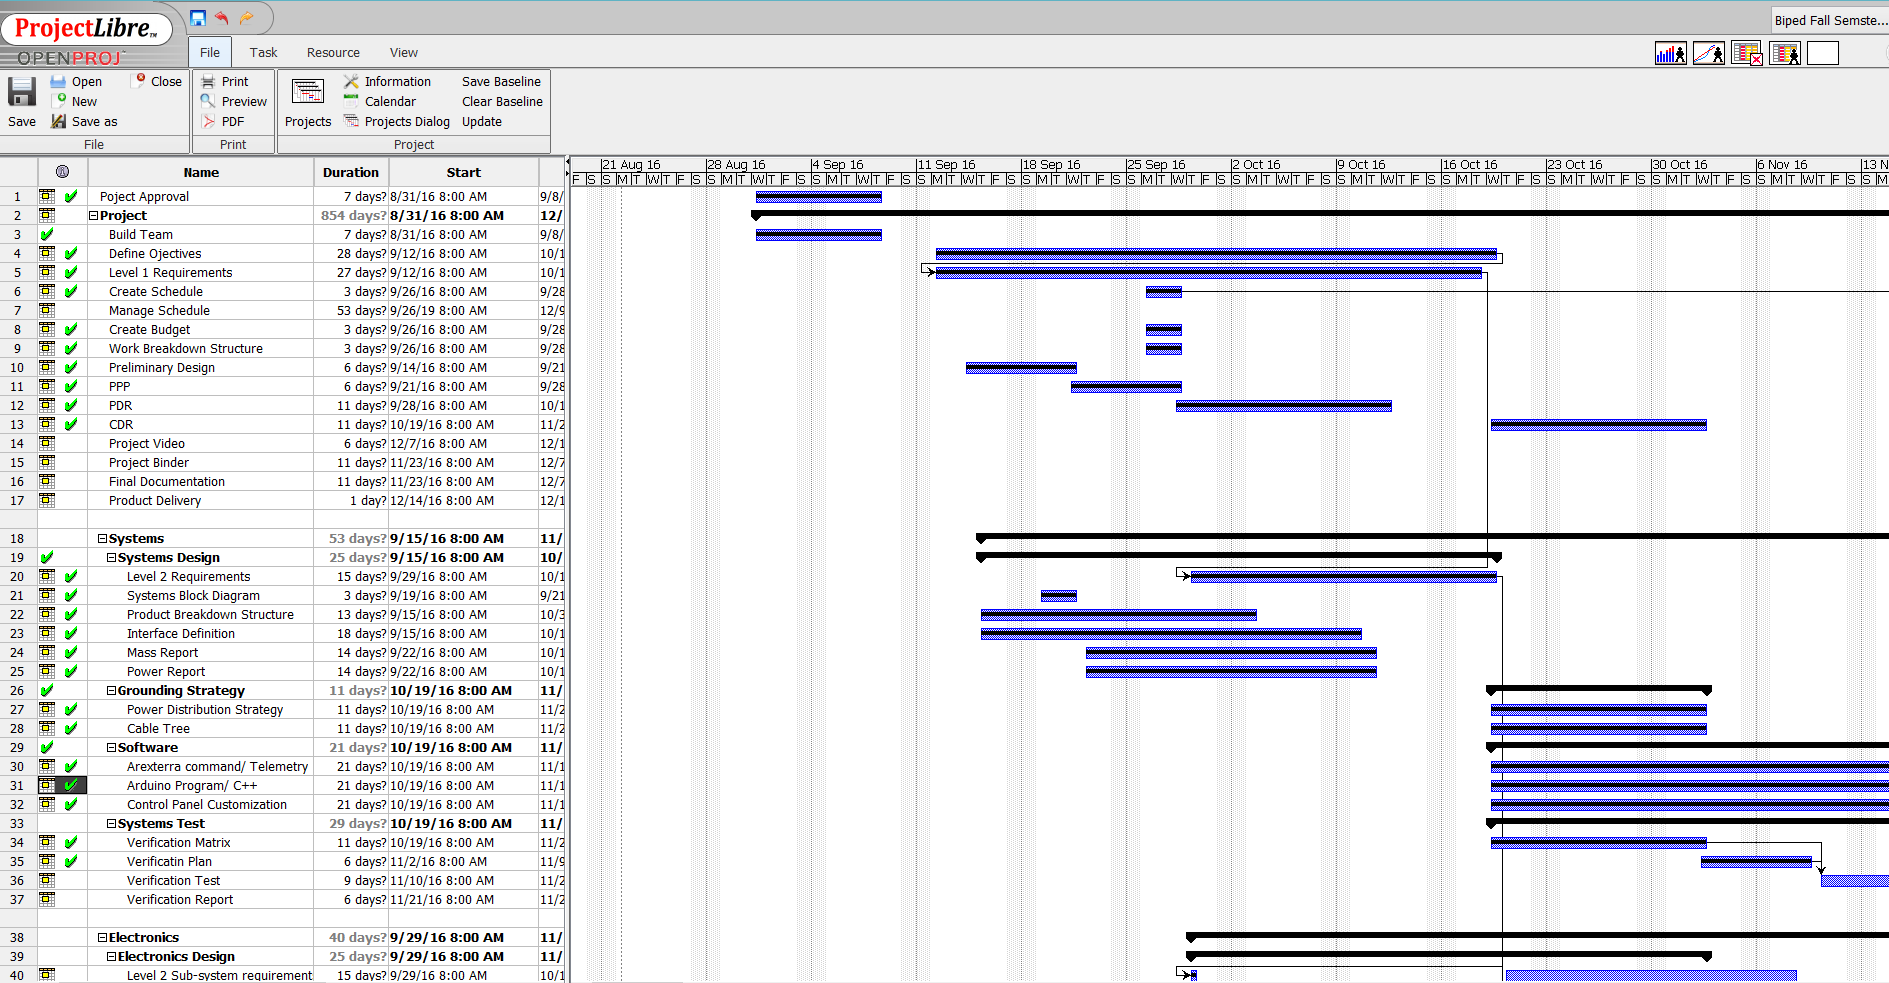


Figure 6-8 Biped’s Project Libre [3]
Burndown
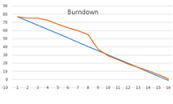
Once the schedule is complete, the next step is to create the burndown. The purpose of the burndown is to represent the progress of the group in a graphical form.
The burndown can be created on excel by listing a column of all the tasks mentioned in the schedule. Then make a row listing the number of the weeks in the semester. After that, fill out the boxes with the percent amount left to accomplish per task each week. This means that the left most column is 1 (representing 100% of the task left to fill in). As the project progresses each week, decrement 1 to represent the amount of work left to complete the task. The last two rows consist of the ideal row (total tasks spanned out with total weeks) and reality done (sum of task percent completed).
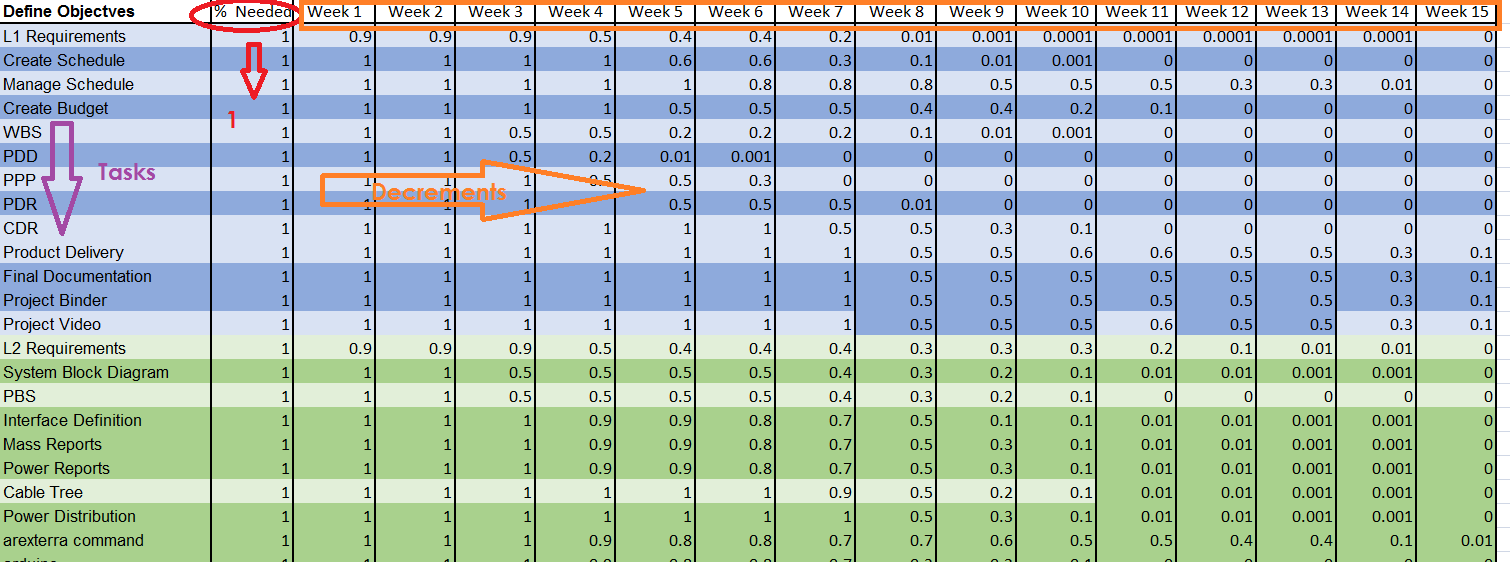
Figure 9 Burndown Excel Example
Biped’s Burndown

Figure 10 Biped’s Burn Down
Conclusion
The burndown is based on the schedules, the schedule is created from the work break down structure, and the work break down structure stems from the job descriptions. The purpose of the burndown is to produce a visual representation of the project task completion. One can find the percentage of tasks completed by dividing the tasks completed by the total tasks.
Reference
[1]http://web.csulb.edu/~hill/ee400d/Lectures/Week%2005%20Project%20Plans%20and%20Reports/c_Generic%20Schedule.pdf
[2]http://web.csulb.edu/~hill/ee400d/Lectures/Week%2001%20Welcome/c_Job%20Descriptions.pdf
[3]http://www.projectlibre.com