Programming the 3DoT using USBasp
When programming your 3DoT board via the micro-USB port, your computer communicates with a portion of code on the ATMega32u4 known as the bootloader to upload your .hex file to program memory. If you want to upload this code directly via the ATMega’s SPI interface, or overwrite the bootloader, you need a separate device to handle USB commands and translate the data to the right format for SPI. The USBasp is an example of such a device.
Follow the instructions below to either:
- Upload .hex files directly (e.g. you are having issues uploading via usb)
- Upload a .hex file that includes a new bootloader (e.g. you selected a wrong board type while uploading code in the Arduino IDE and now your 3DoT is bricked!)
For the second option, download links to the bootloader .hex files are below.
Prerequisites
If you don’t already, make sure you have avrdude installed. An easy way to do this on Windows is by installing WinAVR.
Instructions
Step 1: Download Zadig
Zadig is a tool commonly used for installing drivers. The USBasp programmer needs to have the correct drivers installed to work.
Step 2: Plug in the USBasp to a USB port, and wait a little for Windows to finish trying to install drivers (It will fail!).
Step 3: Open Zadig. In the drop-down menu at the top, select USBasp. In the box on the right, select “libusb-win32”
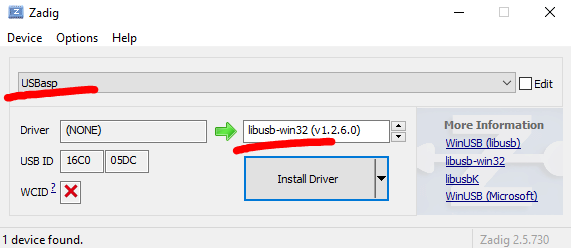
Step 4: Click install. When it’s done, you can close Zadig.exe and delete it.
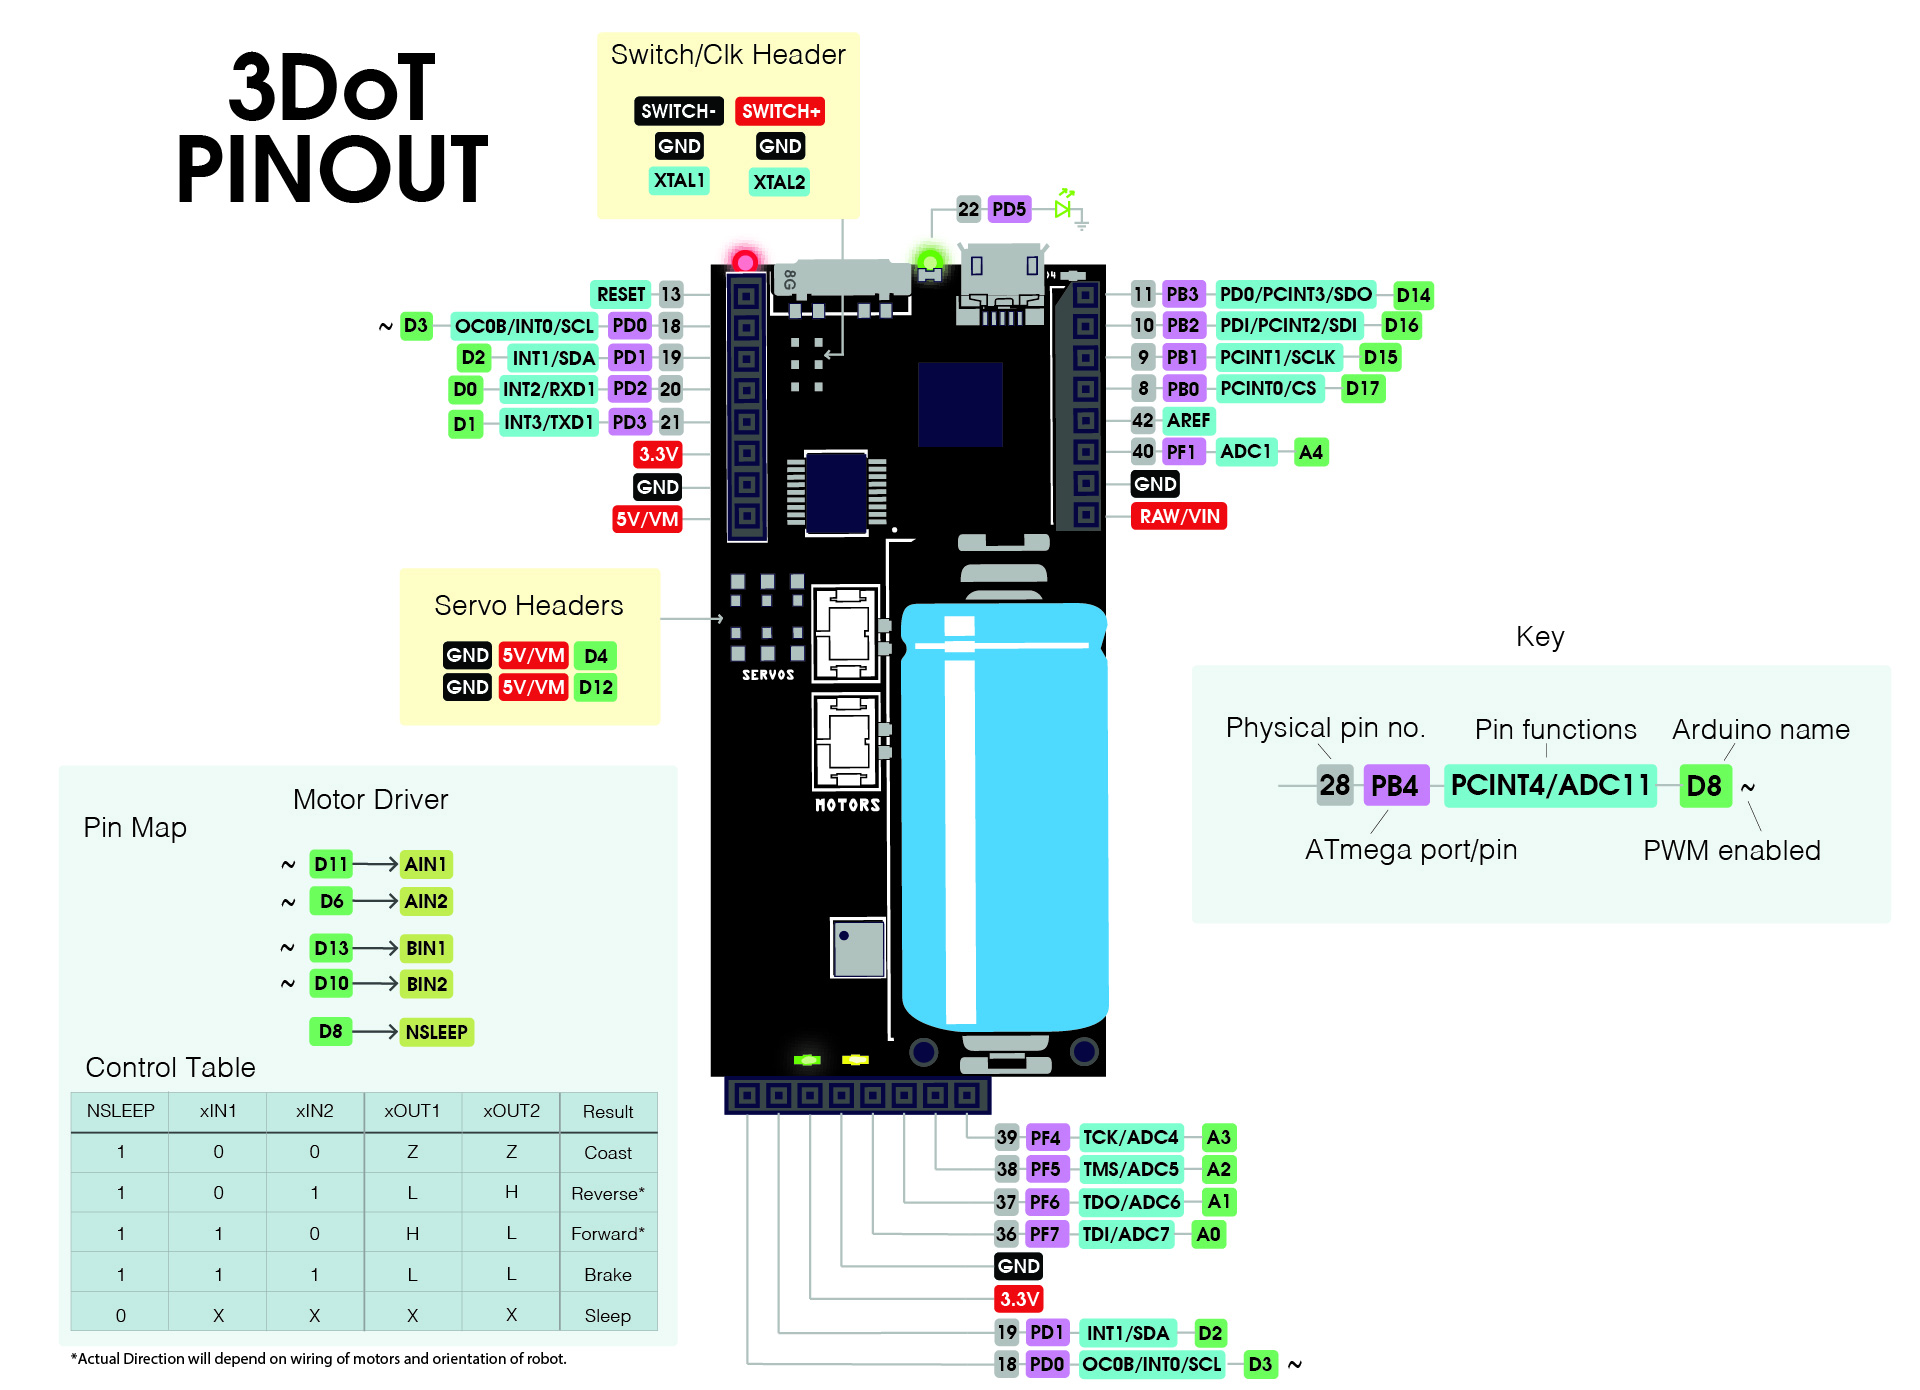
Step 5: Plug jumper wires into SDO, SDI, SCLK and RESET on the 3DoT
Refer to the pinout below. It’s recommended to use different colors for each wire to prevent mixing them up.
Step 6: Connect the wires you just plugged in to the small header that came with the USBasp as follows:
| 3DoT | USBasp |
| SDO | MISO |
| SDI | MOSI |
| SCLK | SCK |
| RESET | RST |
(In case you’re confused, MISO and MOSI are referred to as SDI and SDO nowadays. I left the names on the right column using the old convention since they are printed on the USBasp as such.)


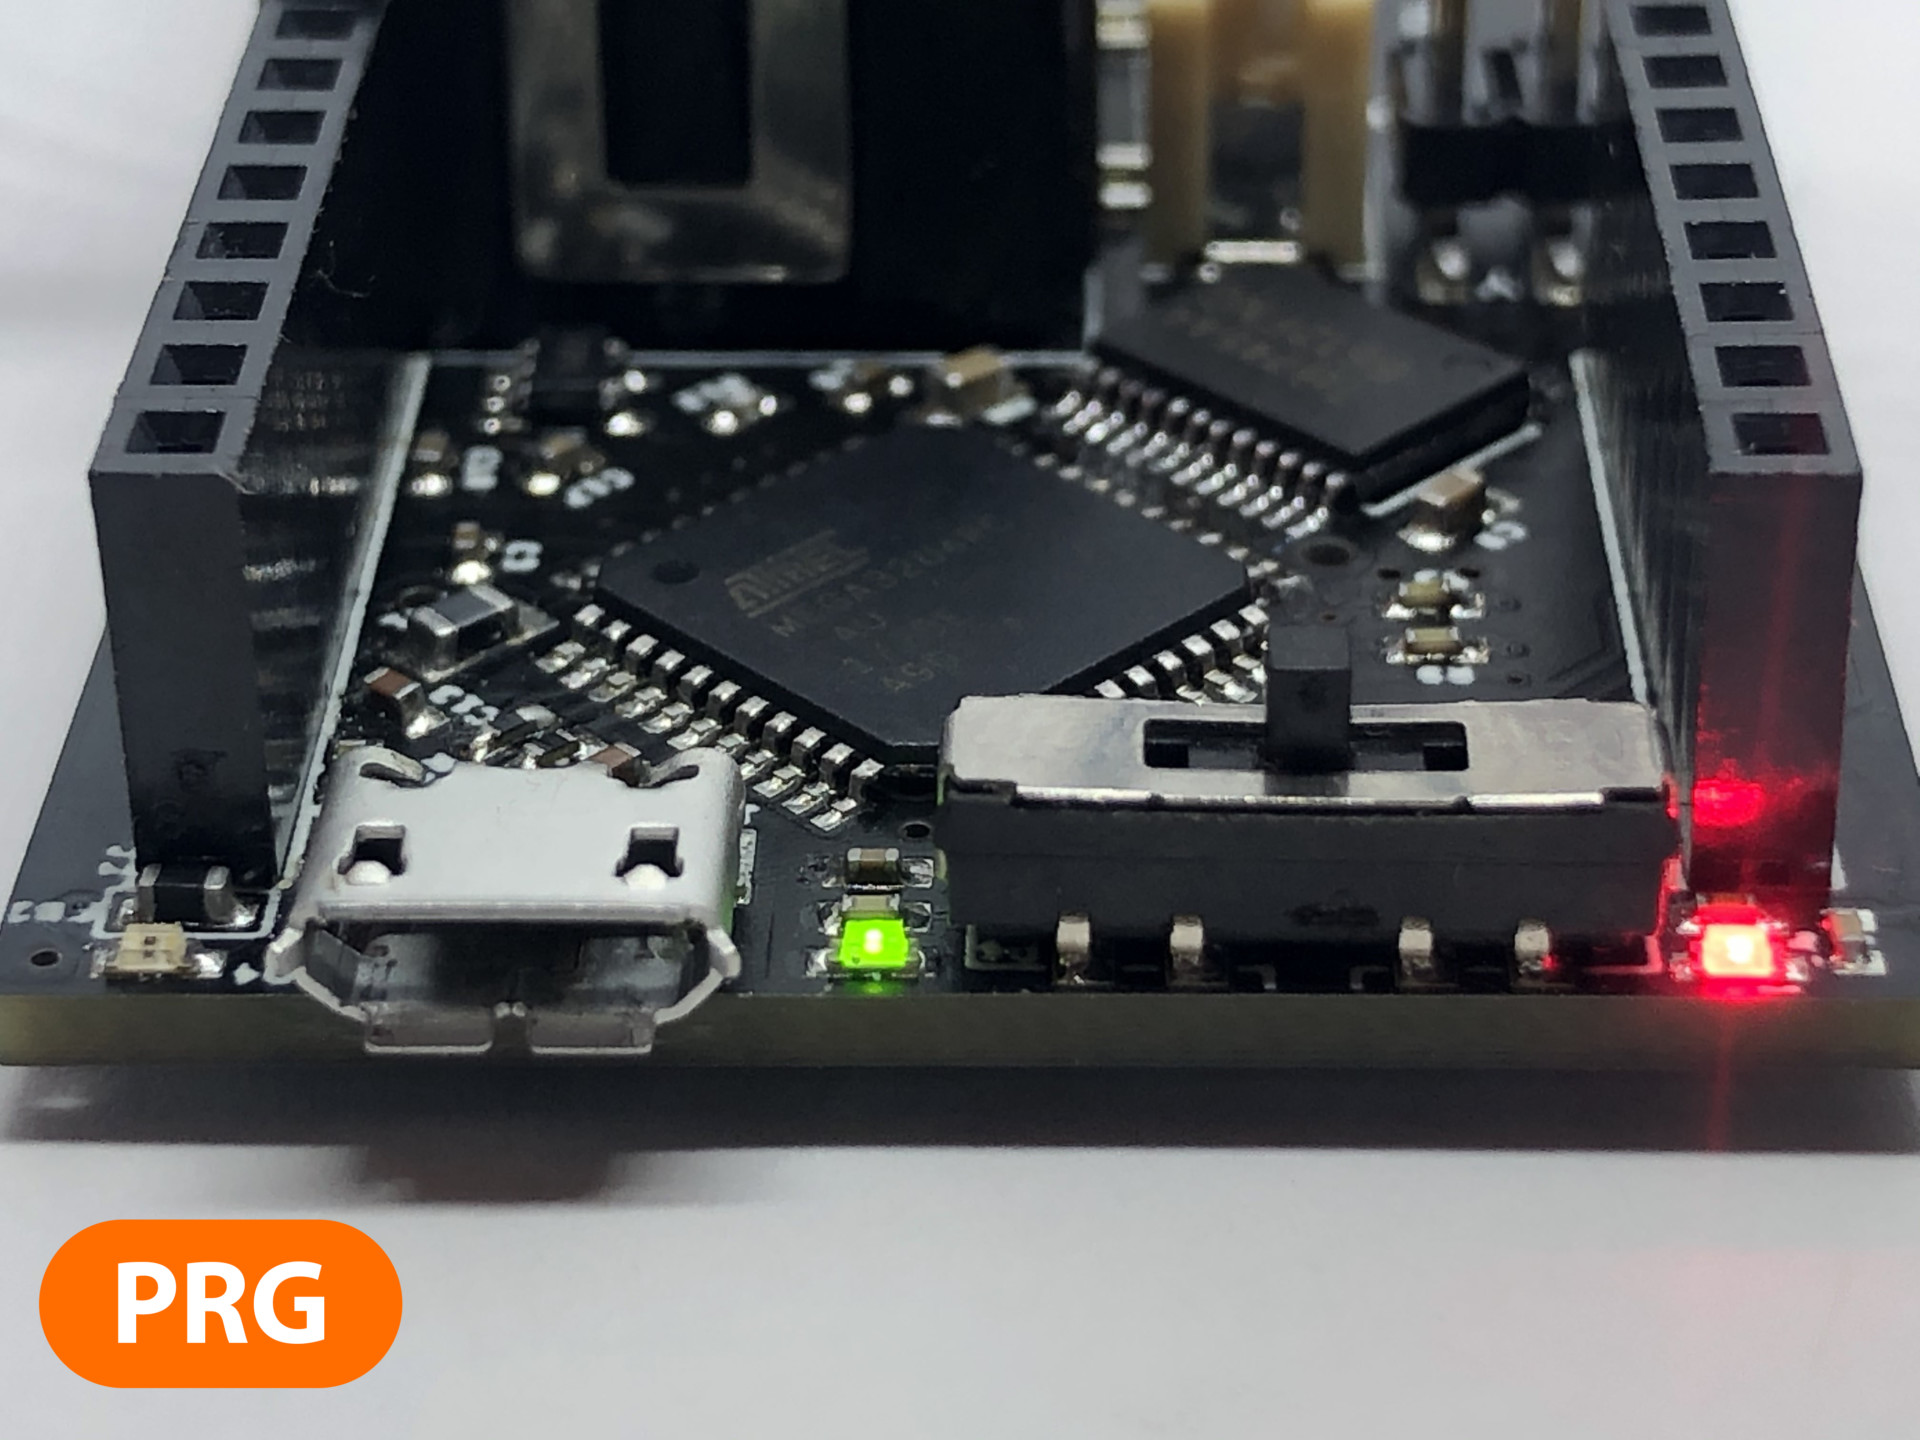
Step 7: Set the 3DoT Switch to the middle position
Step 8: Open notepad and paste the following, changing only “filename.hex” to the name of your hex file.
avrdude -v -p atmega32u4 -c USBasp -P usb -b 57600 -U flash:w:filename.hex
pause
Save as a .bat file
Step 9: Run the .bat file. Your .hex file should upload!
Now, you can disconnect the ribbon cable connector, and leave the rest plugged into your 3DoT, to easily connect and disconnect the programmer.
It’s a good idea to tape or otherwise tie together the jumper wires to keep them connected.

Remember the battery still needs to be charged via USB!