Pathfinder S’17 Final Blog Post

By Martin Diaz (Project Manager)

Edgardo Villalobos (Solar – Design and Manufacturing Engineer)

Anthony Dunigan (Chassis – Design and Manufacturing Engineer)

Renpeng Zhang (Electronics and Control Engineer)

Abdullah Albelbisi (Missions, Systems, and Test Engineer)

Table of Contents

Executive Summary

By Martin Diaz (Project Manager)

Program Objective

1. Articulating custom solar panels which are able to track the sun and enter/exit a cocoon state. The panels will be modular allowing the remote identification (telemetry) and astronaut replacement of a broken module. Additional telemetry requirements include providing information on articulation angles, panel voltages, charging current, and battery fuel level. A cocoon state shall be used during simulated launch, dust storms, and operation over steep terrain.

2. Form factor of the solar panels will be identical to the panels on the Spirit and Opportunity Mars rovers. Sizing of the panels will be consistent with the existing chassis and meeting the form factor of the Mars rovers. Specifically, the size of the panels relative to the size of the chassis will be identical to the mars rovers (scaled model).

3. Electronic slip differential 6-wheel Drive for turning and traversal of rough terrain, specifically, the outside and inside wheels will turn at different speeds while turning, plus wheels under no load conditions will stops spinning.

4. Demonstration of GPS navigation mode with obstacle avoidance (articulating LIDAR sensor)

5. The Mission Objective is to traverse the same course defined for the Fall ’16 Pathfinder.

6. Based on the fixed size of the articulating solar panels, efficiency, sun’s path during time of mission, and the mission objective, the project will propose charge time and batteries for the rover. Margins must be identified.

7. No modification to the pathfinder rover shall preclude future High Desert operations (High temperature materials with cooling system as needed). a. Wheels b. Pan/Tilt platform c. AC Unit

Mission Profile

The S’17 Pathfinder will commence it’s Mission by first exiting a “cocoon state” in front of CSULB’s library, then  traversing .09 miles to it’s destination charging station. To reach it, the Pathfinder will need to traverse up and down a set of 3 steps. GPS Navigation mode will use 11 predefined checkpoints including start and finish L-L coordinates. Along the way, the Pathfinder will operate in articulation mode, in which the solar panels will track the sun and provide current telemetry of each of it’s 36 cells to a sync’d Arxterra App user within Bluetooth range.

Key Features

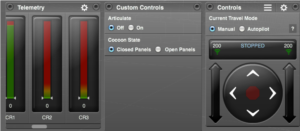
Custom Arxterra Control Panel

  • Buttons for opening and closing panels
  • Buttons for entering and exiting panel articulation mode
  • Meters that show each solar cells output voltage

Proper Rocker Bogie Suspension System

  • Obstacle Climbing
  • Keeps all wheels in contact with ground in uneven terrain

Cocooning and Articulating Solar Panels

  • Solar panels can fold up and down by use of stepper motors and worm gear.
  • Solar panels will move up and down to find a better position for increase sunlight.

Solar Cell Telemetry

  • Solar Cell Current Telemetry that can be viewed through Arxterra control panel.

Pan and Tilt system for lidar sensors


Electronic Slip Differential

  • Inside and Outside wheels will spin at different speeds
  • Any tires under no load will stop spinning

Autonomous GPS navigation and Obstacle Avoidance

  • In autonomous mode the pathfinder will travel to the next coordinate and avoid obstacles along the way.

Rotary encoders to measure each wheel rpm

  • Wheel rpm will be monitored and used in electronic slip differential program.

Level 1 Requirements

  1. L1.1 Pathfinder shall travel a .09 miles course. Course includes going up a set of 3 stairs at 70 degree inclination and down a set of 3 stairs with a downward slope of 70 degree.
  2. L1.2 Pathfinder shall launch from cocoon state. Solar panels folded upward at 85 degrees from base.
  3. L1.3 Pahtfinder shall allow user to manually execute “enter cocoon state” program module via arxterra App to enter into cocoon state at any time.
  4. L1.4 Pathfinder shall all user to manually execute “exit cocoon state” program module via Arxterra app to exit cocoon state at any time. 85 to 210 angle.
  5. L1.5 Pathfinder shall allow user to execute “articulate state” program module which is available after the pathfinder has completed the “exit cocoon state” sequence in order to articulate the solar cells directly at the sun limited to the full bend of each wing, which is between 210 and 85 degrees relative to the solar panel base. articulate state is based on an “articulate state” program module which precisely actuates each wing’s stepper motor module’s parameters which include time of day, GPS location, orientation, and local sun trajectory.
  6. L1.6 Pathfinder shall provide updates of solar panel articulation angles which come from the ‘articulate state” program module.
  7. L1.7 Pathfinder will provide solar panel voltages and charging current by capturing each modular panels electrical output separately.
  8. L1.8 Two side panels, a butt panel, and a base panel shall be modularly encapsulated and wired.
  9. L1.9 From factor of the solar panels will be identical to the panels on the spirit and opportunity.
  10. L1.10 Electronic slip differential 6 wheel drive shall be implemented by an “ESD” program module.
  11. L1.11 Wheels that are not in contact with terrain shall be actuated by “ESD” program module to stop spinning by using currents that match free spinning wheel characteristics as inputs.
  12. L1.12 Pathfinder shall demonstarte obstacle avoidacne during course traversal by articulating 2 lidar sensors via pan and tilt system. The lidar sensors will provide input and be controlled by the waypoint navigation program module used during the fall 16 semester
  13. L1.13 Pathfinder will utilize “waypoint navigation” program module for autonomous GPS navigation
  14. L1.14 Rocker bogie system shall be improved by closely modeling the suspension mechanics behind the mars exploration rovers, curiosity and spirit.
  15. L1.15 Pathfinder will not hinder future use of pathfinder in high desert condition by modification of wheels, pan/tilt platform, and AC unit.
  16. Pathfinder will be ready to demonstrate mission profile and project objectives by may 12th, 2017

System Design

By Abdullah Albelbisi (Missions, Systems, and Test Engineer)

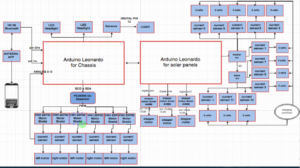
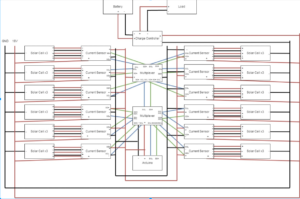
System Block Diagram

Mission Command and Control

We have used Axterra app to develop a custom command to control ( “Cocoon state”, articulate state”, telemetry)


“Cocoon State” : is a state where we can control the panels to either close or open. The initial benefit from cocooning is to prevent the solars from harm causing by natural effect. We control it

by pressing either “cocoon on” or “cocoon off” on the Axterra app.


“Articulate State” : is a state to allow the solar panels to follow the most dense direction of light to produce power and charge the battery. It can be controlled by pressing either “on” or “off” on the Axterra app.
“Telemetry” : 12 custom telemetries have been assigned to address a visual amount of energy is being produced by every 3 solar cells.

Experimental Results

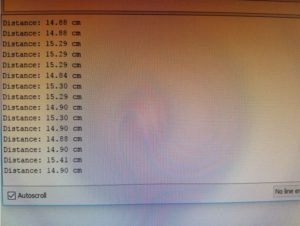
HC-Sro4 Ultrasonic Sensor Test

Wheel Forces Calculations

Solar Current Sensor Experiment

Stepper Motor Control

Solar Panel Voltage Calculations

Encapsulation Trade Off Study

Solar Manufacturing

By Edgardo Villalobos (Solar – Design and Manufacturing Engineer)

As a requirement, the Pathfinder was to have a solar panel in the shape of the solar panels on the Spirit and Opportunity Rovers that would charge the 12V 7Ah battery onboard the Pathfinder. The wings on the solar panel needed to be able to open and close to a cocoon state and also articulate to the sun. Another requirement on the solar panel was to obtain the voltage differential from each of the solar cells to make it easier to pinpoint the location of the non-functioning cell.

The previous semester’s solar panel group had made the wings out of aluminum, which I found to be a little too heavy for the worm gear mechanism used to make the wings open and close. I replaced the aluminum wings with plexiglass in order to lighten the load, which I now know was a mistake as the plexiglass was not strong enough and will not withstand the heavy heat.


The solar panel consisted of 36 6V 100mA encapsulated solar cells that were arranged in series and parallel in order to achieve the right amount of voltage and current to charge the battery in a timely manner. The rule of thumb with solar panels is that the voltage required to charge the battery needs to be one and a half times bigger than the voltage of the battery in order to stay consistent. The cells were arranged to achieve 18 volts. Each panel consisted of two rows in parallel and three cells in series in each row, theoretically making a total of 18V 200mA. The whole solar panel theoretically achieved 18V 1.2A. The solar cell array was then attached to the first two terminals of the solar charger that was placed on the Pathfinder.

In order to fix the worm gear issue, a box with ball bearings could be made to hold the worm gear and spur gear together for a tighter grip. Another solution is to make the size of the gears larger. The problem here is that the weight of the wings was causing the hinge to bend away from the worm gear. In order to get the ball bearing box to work, the placement of the wings and hinges would also need to change. The gears could also use a little oil/grease for easy movement.


Another problem with the wings is that they don’t fully close onto themselves as the material on top of the wings gets in the way. A solution to this could be the use of L-hinges. Although the L-hinges aren’t the nicest to look at, they do provide room for overlap.

In conclusion, I was unable to get the solar panels articulating/cocooning mechanism to function correctly. With the little changes I described will make it work.

Chassis Manufacturing

By Anthony Dunigan (Chassis – Design and Manufacturing Engineer)

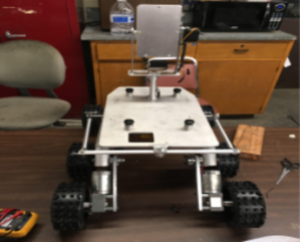
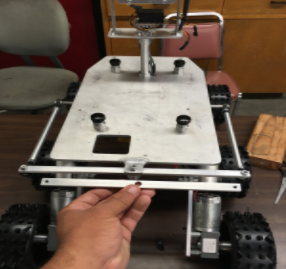
The new chassis design was based on the fulfilling the requirement of improving the rocker bogie design by closely modeling the suspension behind the Mars Exploration Rover. The design is a modified version of the MER Curiosity, Curiosity’s differential bar is located on top of the rover since it did not have any solar panels. But our project has the solar panel so the model that was design last semester place the bar in the rear of the rover. The differential bar allows one leg to rotate down and push the opposite leg down. This will the allow for all 6 wheels to remain on the surface. The issue with the previous design was that the rover could not maintain all 6 wheels when going over an obstacle that is greater than the diameter of the wheel. Mars Exploration Rovers should be allowed to traverse over obstacles that are approximately 1.5 times to 2 times the diameter of the wheel. The previous design could barely traverse over obstacles  its own wheel diameter. The new design to improve the rocker bogie was increase the length of the bar to allow more room for the legs to go up and down freely without hitting the chassis.

The new bar was increased from 9.75 inches to 12.125 inches to accomplish this.

Another issue with the previous design was the bogie pivot (the pivot where the two legs are attached to) were not allowed to move freely. The issue was fixed by by using 2 ball bearing washers on each of the pivot points to allow this free movement.

Magnetic Rotary Encoder

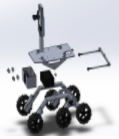
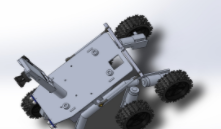
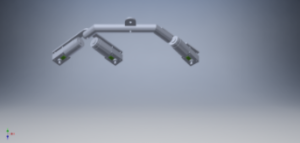
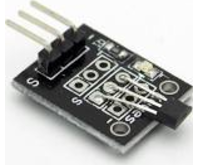
The rotary encoders are currently not placed on the rover. The encoders that may be used are the vetco hall effect sensor module. Below is a 3D model of where the encoders will be placed as well as the sensor

Modified Chassis Design Conclusion
The modified design was not tested. So to see if the modified design works, testing should be done before modifying or applying a new design. Assuming this modified design can work properly, there will still be an issue. This new issue which was discovered near the end of the mission was that the solar panel stepper motors will rest on the rod connectors that connect the legs to the bar. This may not cause any issues initially but it would be best that this issue be avoided. A fix for this would be using the previous design’s differential bar and extending the rovers legs out approximately an inch and half from its current position using longer  socket shoulder screws http://(https://goo.gl/wawpGJ . This design may have issues with having more force being applied onto the longer screw. So some stress testing may be required. An alternative design would be to completely get rid of the differential bar mechanism and opt in for a differential gear box mechanism. The following mechanism would have to be placed in between the battery and electrical box. Which will be an issue due to the battery being in the way of the connection points where the differential gear mechanism will be placed. So the battery may be required to be moved further back to allow this modification.

References

  1. https://docs.google.com/document/d/1NPQc2yRRpnUTUtxoxJKHqFgdvQKcfK46eKzEHFoKYcc/edit
  2. https://docs.google.com/presentation/d/18KhcQu9Qbvz87q95ofyxz0uMTzXnwRA5Ok51WPXzeXQ/edit

Electrical Box Setup

By Anthony Dunigan (Chassis – Design and Manufacturing Engineer)

The current cabling setup for the electrical box is shown below.

The box includes 3 VNH5019 motor shields that are stacked on top of each other. They are stacked to reduce the area that each individual driver  would have taken in the box. An additional hole was drilled into the box to allow more wires to enter the box which will decrease the risk of the wires being frayed or pinched from entering only one access point.

Fuse Protection

An inline fuse was incorporated into the box to protect the circuitry and battery. The previous semester did not incorporate this mechanism. The fuse can go hold up to 20 Amps. But only a 5 to 6 amp fuse will be required for protection. A fuse over 6 amps is not advised due to the max output of the battery being approximately 7 amps and will increase the risk of damaging the battery and circuits. As well as protecting the battery from exploding! The fuse was placed before the switch to protect the switch as well.

Terminal Block/Power Distribution

An 8 block terminal was used to distribute power and ground. The terminal block requires a ring terminal connector. Each ring terminal is red due to the classification of the wires gauge size (16 gauge). The power wires are red while the ground wires are black. 3 of the power lines coming from the output of the terminal block are going to the 3 motor driver shields. 1 wire is connected to the step down voltage regulator. The voltage regulator steps down the 12 Volts from the battery to 5 Volts. The output of the regulator is connected to a breadboard that should supply the arduino leonardo, servo motor, and ultrasonic sensors. Be sure to double check the voltage and current ratings  for all devices in the electrical box. The terminal block also has a custom polycarbonate glass protection on it. This should protect the terminal block from making contact with other electrical devices within the box.


Cabling Conclusion

The issue with current electrical box is that it is too small (7x5x3 cubic inches). A larger electrical box may be required to give sufficient room for all the required components that need to be placed. A larger electrical box will also allow you additional room just in case any additional components need to be placed inside such as the solar panel pcb and charge controller. The charge controller can have its own enclosure placed on the back side near the battery. But you must also consider the possible new mechanical design of the differential gearbox that may not allow the charge controller on the rear near the battery due to the new placement of the battery.

A smaller inline fuse may be used as well to increase the amount of room inside the electrical box. Additional fuses to be placed in line with the motor shields should be considered.

PCB

Schematic

By Renpeng Zhang

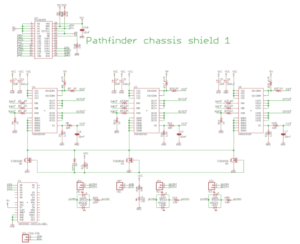
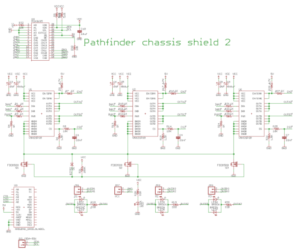
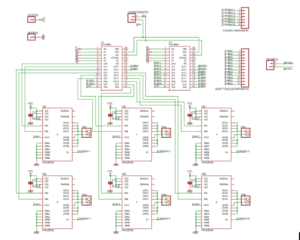
For the motor drivers and I2C expander, we decided to make it into a shield for Arduino. However, due to the size and number of the motor drivers; we weren’t able to put them into a single shield, so we decided to do two shields and stack them on top of the Arduino Leonardo. Due to the size of the heatsinks on the motor drivers, we have to design the shield in such a way where the top shield won’t cover up the motor drivers on the bottom shield. After careful considerations, we decided to put one PCA9685 I2C expander with three motor drivers on the first shield and the other PCA9685 I2C expander with the other three motor drivers on the second shield. The schematics for the two shield are identical except for the current sensing pins. The first shield utilizes the first 3 analog pins and the second shield utilizes the last 3 analog pins.

New design as a platform for Pololu VNH5019 dual motor drivers

Solar PCB

Previous Semester’s PCB was assembled. Still needs cleaning up.

Chassis –  PCB Layout

By Anthony Dunigan (Chassis – Design and Manufacturing Engineer)

Without Polygon

With Polygon


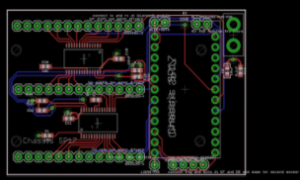
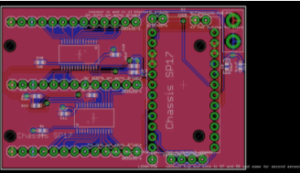
This is the completed or the most recently updated version of the custom PCB. This current version of the PCB will consist of 2 PCA9686 IC’s (I2C), multiple resistors and capacitors. The layout consist of 3 VNH5019 motor shield connectors. There will also be  arduino micro connectors, power pin connectors, lidars sensor connector, bluetooth connectors, and an alternate arduino pwr connector. This custom PCB will be using existing parts within the chassis. The existing parts are the motor shields and bluetooth. The additional parts needed will be the arduino micro. The PCB size is about 4 square inches. Includes holes for mounting the PCB.

Reference

  1. https://drive.google.com/open?id=0B9ZODu6tlNEcUnZkNWFUNWVKY3c
  2. From the Chassis_5_5 folder. File: Chassis_5_5D4.brd


Software

By Renpeng Zhang

General Software Flowchart

Rover control flowchart

Solar Panel State Flowchart

Verification Matrix

By Abdullah Albelbisi (Mission System and Test)

https://drive.google.com/open?id=0B3RM6QKrhjFIMzJsQkdUU0taOVE

https://drive.google.com/open?id=1xGVLvXXeleSxb98yUkLiqC7xg8m5uiotWOjMOk3OwaA

Project Documentation

Resource Report

By Everyone

https://drive.google.com/open?id=1_Cagu3YueXAvwMQgK7jMg-9QrC4VUImQfjhPlNaiu9Y

Cost Report

By Everyone

https://drive.google.com/open?id=1_Cagu3YueXAvwMQgK7jMg-9QrC4VUImQfjhPlNaiu9Y

Schedule

By Martin Diaz (Project Manager)

The schedule was created using project Libre. The task were separated by division and then scheduled with the critical tasks in mind.

https://drive.google.com/open?id=0Bz6ZQqAMFyLHSG5tTl9rQm15Yk0

Burndown

By Martin Diaz (Project Manager)

The burndown was created by getting each task from the project Libre into excel and then assigning percent completion for each week.

https://drive.google.com/open?id=0Bz6ZQqAMFyLHUThNWkgzQy1YdE0

Creativity

https://drive.google.com/open?id=104MTPy6nEF7KAQX6WpWLSnreQI6UHw2A80UVELk3wzg

PDR

https://drive.google.com/open?id=1vk9dVFMz31RVrXSXGV3NOuN1yaQoOdQNtvI5ly98sz8

CDR

https://drive.google.com/open?id=1soV0-mG75nks4ojD8DVIlJpCzfBcPZe9JpZQoynt9Ls

What We Learned From This Semester

By Martin Diaz (Project Manager)

One of the things I learned late in the semester was to ask the division for help. Don’t assume they won’t want to help you. The division managers can step in and help your project a lot and even get their engineers from other projects to help support your project.


Asking Professor Hill is also a lot of help. Especially with circuit design, schematics, and PCB layout.  We were having a lot of trouble trying to make our custom PCB on our own and then went to Prof. Hill for help. He said he enjoys circuit design and wished we had seen him sooner. If we had we would have completed our PCB in time.


One of the difficulties the group had was not be able do work on the project because one of the members had certain parts. I suggest getting similar parts from Prof. Hill so they can work on similar systems. For example you can 6 smaller motors and breadboard them to test your code instead of waiting for a chance to work on the actual motors you are going to use.


Project Video

https://drive.google.com/open?id=0B4jU8uMDmOoiYW52NWhSTVc1ZDg

Resources

EagleCAD Files – https://drive.google.com/open?id=0B_Kn5EG3fBjuejZyajBfYWVKWE0

Fritzing Files – https://drive.google.com/open?id=0B_Kn5EG3fBjuaURKRTBUR2M3QTA

Arduino Code – https://drive.google.com/open?id=0B_Kn5EG3fBjuMV9MZERvaENvUVE

Solar Design and Manufacturing Files – https://drive.google.com/open?id=0B4jU8uMDmOoiVVp5dkFRbC1jRTA

Chassis Design and Manufacturing Files – https://drive.google.com/drive/folders/0Bz6ZQqAMFyLHcXlsVm5lNUlIeXc?usp=sharing

Verification and Validation – https://drive.google.com/open?id=0B3RM6QKrhjFIR3JqcHZLRmVmUDA

Bill of Materials – https://docs.google.com/document/d/1fk77AdEc3pNCxLTQE3WCtPdG5hXLdYsb-yxXMa35l6k/edit?usp=sharing


Spring 2017 – SpiderBot Project Summary

Table of Contents

Project Overview

Executive Summary

By Nicholas Jacobs – PM

The purpose of SpiderBot is to make an inexpensive, fun toy that can walk, turn, launch a grappling hook, and raise/lower itself to/from a predetermined height. While anchored, SpiderBot will provide a live video feed to the Arxterra Control Panel.

System Design

By Jefferson Fuentes – MST

SpiderBot consists of the 3DOT controller board based around Atmel’s 32U4. 3DOT also incorporates the TB6612F Dual Motor driver that drive two DC motors that enable SpiderBot to walk. SpiderBot also has a custom built grappling  hook that is launched under rubber-band tension. Once the grappling hook anchors to a fixed position the custom made winch motor assembly hoists SpiderBot to an elevated position. The 3DOT board can only drive the motors meant for walking, the custom PCB incorporates another TB6612F to drive the winch motor, and a PCA9685 PWM Expander that enables the custom PCB to communicate with the 3DOT board via I2C. To see our System Block Diagram go here.

Subsystem Design

Experimental Results

By Nicholas Jacobs – PM

At the onset of our design,  multiple trade off studies to determine what parts are required to complete our requirements. Our material trade-off study explored SpiderBot’s possible composition, while the motor trade-off study  looked at possible DC motors that could best meet the customer requirements. Once the proper DC motors was picked and ordered, we conducted a motor torque test to verify that the chosen motors were up to the task. We also conducted an experiment that determined the most effective way to suppress DC motor noise generated by the commutators switching polarities.   Lastly, since SpiderBot’s purpose was to provide a live video feed to the Arxterra Control Panel from an elevated position, we had to determine what reliable size maze could be covered with the phone being used. The experimental steps can be found here.

Interface Definition

By Jefferson Fuentes -MST

Interface definitions are used to determine the connections within the project.  The most crucial component, the ATmega32u, is the the brains of the project and process all commands.  Interface definitions for the the custom PCB are also included, showing how to connect it all to allow for proper function.The final, most updated description that explains the the inner workings and connections for the 3DOT controller, and the custom PCB  can be found here.

Mission Command and Control

By Jefferson Fuentes -MST

One requirement stated that SpiderBot is to be controlled by the Axterra App via a bluetooth connection. The Missions System and test Engineer’s job was to configure any custom command and telemetry decoding and encoding schemes that were necessary for SpideBot’s mission. Instructions, software block diagram, Arduino code, and  a detailed description the Arxterra Control Panel set-up can be found  here.

Electronics Design

By Shaun Pasoz – E&C

The motors that drive SpiderBot’s legs were initially GM3 DC motors. However the way they were mounted and the weight they had posed problems. Instead we settled on SparkFun’s MicroGear motors for they’re size, weight, low stall current, and very high torque output.  Pololu’s Microgear Motors.

Another capability that SpiderBot had was to launch our a grappling hook remotely via the Arxterra App. This was done by controlling a 3.3 volt servo from the 3Dot board. Since the grappling system is rubber-band actuated the servo unlatches a sear-style catch that allows the grappling hook to launch. Additional information can be found here click on 3.3volt_servo.

Firmware

By Shaun Pasoz – E&C

Firmware for controlling the 3DOT, custom PCB, and 3 DC motors, along can be found here.

PCB Schematic

By Shaun Pazos – E&C

Our custom PCB incorporated an additional TB6612F motor driver to drive our winch motor that allowed for SpiderBot to climb. Also on our custom PCB is a PCA9685 PWM Expander and its main purpose was to relay data packets from the 3DOT controller to our custom PCB via I2C. Additional information can be found here click on Custom_PCB_Chips.

PCB Layout

By Daniel Matias – MFG

More information can be found on our Custom PCB blog post after it had been built and tested. Unfortunately, only briefly did the custom PCB work. It will forever remain a mystery as to why. Additional pictures and other resources can be found here.

Hardware Design

By Daniel Matias – MFG

SpiderBot was based off the TerrSpider Instructable. The first build of SPiderBot consisted entirely of 1/4 inch acrylic. This caused SpiderBot to have a naked weight of 800 grams. The customer rejected this design and required that SpiderBot’s size be reduced. The first build was a costly one too, you can read all about it in our lessons learned blog post.

After the Critical Design Review SpiderBot was reduced by 25%. This resulted in a more streamlined design, and drastically reduced SpiderBot’s weight. All SolidWorks files and animations can be found here.

It’s amazing the ideas one can find on Youtube.  Our winch design is slight modification of a Westimation Miniature Winch . This design is desireable because of its size and torque.


Verification & Validation Test Overview

By Jefferson Fuentes -MST

Spiderbot was only tasked with doing a verification matrix this semester.  It consists of all requirements, testing procedures, and outcomes.  The detailed plan explaining how all tests were conducted can be found here.

Project Status

Power Allocation

By Jefferson Fuentes -MST

Power report should ideally be three separate reports denoting all power allocations on the project, Battery, 3DoT, and custom PCB.  Each power report must include the max, min, and average  power consumptions.  This data will ensure proper power allocation to project, as well as expose any over/under power supplied.

Mass Allocation

By Jefferson Fuentes -MST

Spiderbots resource reports consist of cost, mass, and power allocations.  Mass is the sum of all components on project minus the phone.  The total mass is what the DC motors, movements and winch, must be able to provide power and torque to in order to move.

Cost Report

By Nicholas Jacobs – PM

As we mentioned in our lessons learned blog post,  the first build of SpiderBot was a costly one. The laser cutting for Build 1 consumed ~42% of ur initial budget. To look at our cost breakdown click here. 

Updated Schedule

By – Nicholas Jacobs – PM

Keeping and adhering to a strict schedule is very important, especially in the first 6 weeks of the class. Once a design has been chosen and approved by the customer task your manufacturing engineer to start laser cutting or printing. The project manager and systems engineer should begin developing level 1 and level 2 requirements based on the Program Objective and Mission Profile.

If your laptop or desktop screen has a 3200 X 1800 resolution then ProjectLibre is NOT the scheduling software for you. I would suggest using Microsoft Scheduler instead.

Here is our top level and subsystems semester schedule. The top level schedule covers the tasks that, if not completed, will result in an incomplete or failed project. The subsystems schedule is a specific breakdown of tasks by division. Keeping track of this and updating is critical for mission accomplishment.

Final Thoughts

By Nicholas Jacobs – PM

During the last 4-5 weeks of the semester problems were discovered that could be solved with the remaining time of the semester. The walking mechanism never 100% worked all the time. During a revolution of the leg linkage is a point where the drive gear pinches one of the driven gears making the motor stall.   Luckily the motors run at 5 volts. Most of the time this was enough to power through friction points and offset hand drilled shaft holes. As the crow flies looking down at SpiderBot from above, you’ll see that the SparkFun MicroGear motors aren’t normal to the side panels they engage with. I believe that if this were fixed, this would correctly align the drive gear to the two driven gears.

One misfortune was the custom PCB. It not working was a surprise because of the number of revisions we had along with the number of eyes who reviewed it- I was sure it would be plug and play. Looking back at the PCB layout, I would have added a power and ground plane. This will cut down on noise by eliminating the number of open loop antennas created by traces.

One bigger regret I have for SpiderBot is not taking the time to research the parameters of the Simulink Winch Model. Calculating the parameters necessary for this model could have influenced our winch motor selection or helped us better design a better gear ratio to increase speed. At a bare minimum we would have been the only group to have any kind of Simulink model for any subsystem of our project.The winch built for SpiderBot didn’t have a brake and was deleted from the model.

This semester’s SpiderBot was successful for two reasons. The first being that we decided to go with an Instructables Project that PROVIDES DESIGN FILES!!!!!!!!!!! ( Be Careful ) Once we decided on the TerraSpider concept, already having the .dxf files allowed us to print and produce our strawman design the following week. Remember our jobs as engineers is to be more effective rather than original, in this case starting off with something already done saved countless hours of unnecessary design time. Strawman design is another name for a proof of concept or first draft, but is ultimately something that undergoes the iterative process-which undergoes continual improvements and modifications which slowly morphs into a robust, well made end product.  The second reason is that we kept our self in a small box, otherwise know and KISS- Keep it simple, stupid. We set very REALISTIC and SIMPLE goals that, we as a team felt were actually realizable – walk, turn, turn a servo and climb.

Resources

SpiderBot Video

CDR 

PDR

Project Libre (with Excel Burndown file)

Verification and Validation documents

Solidworks File

Fritzing Files 

EagleCAD files (zip folder) Linked to in Electronics Design Blog Post

Arduino and/or C++ Code (zip folder) Linked to in Software Design Blog Post

Complete Bill of Materials (BOM)


Spring 2017 Mini Pathfinder Motor Trade Off Study

By: Moses Holley (Electronics and Control)

Introduction

The objective of this trade off study is to find a motor that meets our robots requirements and also satisfies mission verification.

Subsystem Relation

Motor selection ultimately depended on the Mini Pathfinder’s size. Initially, the customer wanted a rover that could fit in one’s pocket and also in the palm of their hand. With this perspective we looked in to micro vibration motors. After a few meetings with the customer, we can to an consensus to have the Mini Pathfinder scaled down to 1:4.57 for length and height of the sojourner rover to minimally encompass the 3DoT Board. That in turn caused the wheel size to be 28 mm high and have the motors encased making the motor not visible.

Micro Vibration Motors

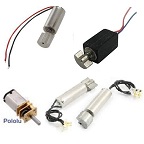
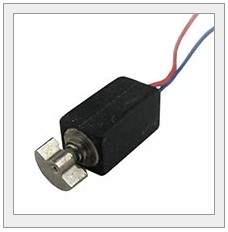
The vibration motors that we were interested in for our initial design can be seen here[1].  These motors require a gearbox to bring down the RPMs. Some of these motor RPMs were as high as 15000 RPM. In creating the gearbox we would have to alter the shaft and place the gearings on top of the shaft.

Figure 1. Micro Vibration Motor

Micro Metal Gearmotor HP 6V

The updated design scale granted to me to to choose a motor that must not exceed 19mm. The 19mm was given by the 2mm clearance of the 3D print of the wheels on top and bottom of the motor. The motors chosen has a 12mm diameter [2]. It also already had its own gearbox that produced 30 RPMs according to the specs. I figured this would be a great motor size just in case we make additional adjustments to the wheels. We later did make adjustments by adding shaft encoders. There was still enough clearance for the wheel and the shaft encoder.

Figure 2. Micro Metal Gear Motor

Conclusion

When choosing a motor for the Mini Pathfinder, we came to find out the size of the robot is a huge factor. Our first idea of the motor caused me to research for micro vibration motors. Those motors required many adjustments to benefit the Mini Pathfinder. Fortunately, we were able to resize our robot which actually granted us a motor that not only met clearances but also ideal performances through the assembled gearbox. After this trade off study, we decided to use the Micro Metal Gearmotor HP 6V motors for our design.

References

[1]https://www.digikey.com/product-detail/en/jinlong-machinery-electronics-inc/Z4TL2B124064X/1670-1016-ND/6009921

[2]http://www.ebay.com/itm/131747528794?_trksid=p2060353.m2749.l2649&ssPageName=STRK%3AMEBIDX%3AIT

Spring 2017 Mini Pathfinder Updated Mission Profile

By: John Her (Project Manager)

Introduction

The Mini Pathfinder mission has changed since the PDD where it will no longer participate with other robots in a game. Instead, the Mini Pathfinder will have the same mission as the Spring 17’ Pathfinder but scaled down.

New Mission Profile

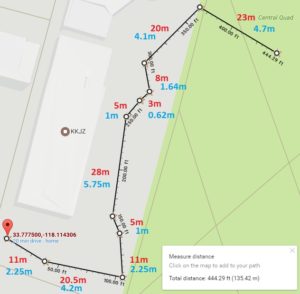
We will remotely traverse a course of approximately 27.8 meters in length. The course will have 3 stairs it will descend and 3 stairs it will ascend with each stair being 27mm. During this course the Mini Pathfinder will demonstrate electronic differential turning, solar charging, proper rocker bogie mechanics and provide telemetry.  

Figure 1. Pathfinder distances in Red. Mini Pathfinder distances in blue

Since the Spring 2017 Pathfinder is inherited from the Fall 2016 Pathfinder, the distance from the center of the front wheel to the center of the rear wheel is a total of 19.22 inches or 488.188mm [1]. To get the scale factor, we find the distance from the center of our front wheels to the center of our rear wheels which has a measurement of 99mm. (488.188/99=4.9311919). We mapped the coordinates of the Spring 2017 Pathfinder and used google maps and its measuring tool to get approximate measurements.  

Conclusion

With the new Mission Profile set, we can continue with our design of the Mini Pathfinder.

References

[1]http://arxterra.com/the-pathfinder-fall-2016/#Hardware_Design

Spring 2017 BiPed – Color Sensor Experiment

By: Abraham Falcon (Electronics and Control)

Approved by: Alexander Clavel (Project Manager)

Table of Contents

Introduction

The electronics and control engineer job is to find the right equipment and test it for its project functionality. To make sure the biped can participate in the game it must have a color sensor to detect the red dots placed on the floor. This experiment was done to see if the adafruit color sensor can sense red and to discover what the best range of detection is. As per the requirements of our project, this test was able to verify that we were indeed able to detect dots as well able to detect the dots at the specified distance of 2mm.

Equipment

Material Quality
Arduino Uno (any family of Arduino) 1
USB Printer Cable 1
Breadboard 1
Male to Male Jumper Wires 4
Color Paper (Red)

(Any objects that is red in color)

1

Table 1

Arduino Code

The code below is from adafruit which can be located in the reference section of this post. The purpose of the following code is to be able to give feedback on the raw data of the colors. We were able to test this by placing different colors under the sensor and observing the given data.

#include <Wire.h>

#include “Adafruit_TCS34725.h”

Adafruit_TCS34725 tcs = Adafruit_TCS34725(TCS34725_INTEGRATIONTIME_700MS, TCS34725_GAIN_1X);

void setup()

{

  Serial.begin(9600);

}

void loop()

{

  uint16_t r, g, b, c, colorTemp, lux;

  delay(25);

  tcs.getRawData(&r, &g, &b, &c);

  colorTemp = tcs.calculateColorTemperature(r, g, b);

  lux = tcs.calculateLux(r, g, b);

  Serial.print(“Lux: “); Serial.print(lux, DEC); Serial.print(” – “);

  Serial.print(“R: “); Serial.print(r, DEC); Serial.print(” “);

  Serial.print(“G: “); Serial.print(g, DEC); Serial.print(” “);

  Serial.print(“B: “); Serial.print(b, DEC); Serial.print(” “);

  Serial.print(“C: “); Serial.print(c, DEC); Serial.print(” “);

  Serial.println(” “);

}

This code using the raw data from previous code from Adafruit will now check for red color since it is part of the requirements for the BiPed.

#include <Wire.h>

#include “Adafruit_TCS34725.h”

Adafruit_TCS34725 tcs = Adafruit_TCS34725(TCS34725_INTEGRATIONTIME_700MS, TCS34725_GAIN_1X);

void setup()

{

  Serial.begin(9600);

}

void loop()

{

  uint16_t r, g, b, c, colorTemp, lux;

  delay(25);

  tcs.getRawData(&r, &g, &b, &c);

  colorTemp = tcs.calculateColorTemperature(r, g, b);

  lux = tcs.calculateLux(r, g, b);

  float ColorAverage, RED, GREEN, BLUE;

  ColorAverage = (r + g + b) / 3;

  RED = r / ColorAverage;

  GREEN = g / ColorAverage;

  BLUE = b / ColorAverage;

  if (RED > 1.4 && GREEN < 0.9 && BLUE < 0.9)

  {

    Serial.println(“RED Detected”);

  }

}

Experiment

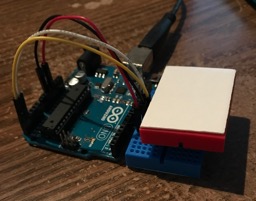
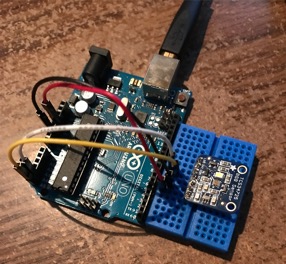
To perform the experiment, the color sensor was placed on the breadboard for easy connection. The color sensor itself  has four connections and the Arduino was powered by the computer through USB connection. The four connections that are being used are SDA, SCL, Vin and GND. Vin and GND are connected respectively to the Arduino for 3.3 volts and ground. Below is how the color sensor is connected to the Arduino to the computer.

Figure 1

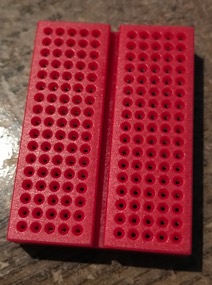
Figure 2 shows the mini breadboard we were using to test the actual sensing of the color red. There were various other objects of different sizes and colors that were used to see whether or not the sensor is was picking only red or if there were any errors of any kind. We did not want the sensor to pick up a bright orange when what we really wanted was red. We were able to verify that it only detected red and on any other color would not light up the LED counter.

Figure 2

To conduct this test, the red mini breadboard was placed on top of the sensor to detect red and to see how this color sensor performs. Figure 3 shows the set up and how the test was actually performed. This was the first step to show that the components were performing the way we wanted it. Once we had verified that it was picking up red and only counting the red objects we then moved on to trying to find the optimal distance.

Figure 3

Figure 4

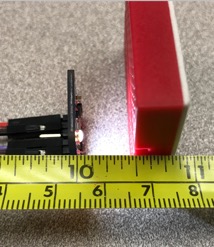
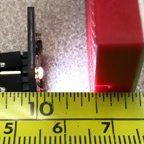
Figure 4 shows the test that was done to find out the operational range of the color sensor. The setup was very basic in the way that the color sensor was connected to the Arduino and placed side ways. A tape measure was placed along side it to indicate distance. The red mini bread board was then placed at varying distances. We initially put the sensor an inch away from the red object, but nothing was detected. From there we continuously moved the red object an eighth of an inch closer and closer until the red color was detected. The resulting distance happened to be about half an inch. This distance is well over our required detection distance of 2mm.

Analysis/Data

Table of Results

Color Sensor Operating Voltage (Volts) Operating Range for Biped (Inch)
Adafruit RGB Color Sensor 3.3 V 0.5 in

Table 2

Raw Color Data

Figure 5

Figure 5 shows the raw data for the colors, which are red, green, and blue. This sensor detects and uses this raw data as a reference code to be implemented to detect red for biped function. The raw data shown is sensing red green and blue, but the point was to take account of the red values. To do this we took the red, green, and blue raw values to a sum which will be called the average. So we then used the total raw values and then divided the specific color raw values to get the ratio of those colors from the sensor raw data. Using this ratio, we can make conditions where it reads only red when these conditions are true. In the section of Arduino codes, the code for reading red is provided. This code will help detect red and to be use for biped main code.

Arduino Serial Monitor Test of Detection

Figure 6

Using the previous codes to detect red the red mini breadboard was detected and shown on the Arduino serial monitor. This code is successful for detecting red and will be used for biped main code.

Conclusion

Performing this color sensor experiment we can see that this sensor will operate successfully for the biped to participate in the game. This sensor will help the biped be able to read red dots placed on the floor. It also shows that the color sensor will perform well and beyond the range of what is actually required. In conclusion the tests were successful and showed that the mission is achievable.

References

  1. http://www.makerblog.at/2015/01/farben-erkennen-mit-dem-rgb-sensor-tcs34725-und-dem-arduino/
  2. https://learn.adafruit.com/adafruit-color-sensors?view=all – programming

HC-SR04 Ultrasonic Sensor Test

By Renpeng Zhang

HC-SR04 range test

Table of Contents

Table

Range HC-SR04 was tested

Code

/*

* HC-SR04 testing code

* Connect Vcc to 5V

* Connect Gnd to Gnd

* Connect Trig to pin 9(PWM)

* Connect Echo to pin 10(PWM)

*/


// defines pins numbers

const int trigPin=9;

const int echoPin=10;


// defines variables

long duration;

double distance;


void setup() {

 pinMode(trigPin, OUTPUT); // Sets the trigPin as an Output

 pinMode(echoPin, INPUT); // Sets the echoPin as an Input

 Serial.begin(9600); // Starts the serial communication

}

void loop() {

 // Clears the trigPin

 digitalWrite(trigPin, LOW);

 delayMicroseconds(2);

 // Sets the trigPin on HIGH state for 10 micro seconds

 digitalWrite(trigPin, HIGH);

 delayMicroseconds(10);

 digitalWrite(trigPin, LOW);

 // Reads the echoPin, returns the sound wave travel time in microseconds

 duration=pulseIn(echoPin, HIGH);

 // Calculating the distance

 distance=duration*.034/2-1;

 // the -1 is to factor in the error of my specific sensor and put it into consideration

 // Prints the distance on the Serial Monitor

 Serial.print(“Distance: “);

 Serial.print(distance);

 Serial.println(” cm”);

 delay(500);

}

Output

Source

http://howtomechatronics.com/tutorials/arduino/ultrasonic-sensor-hc-sr04/


Spring 2017 Mini Pathfinder Size Calculations Update

By: Johnathan Chan (Manufacturing-Chassis)

Intro

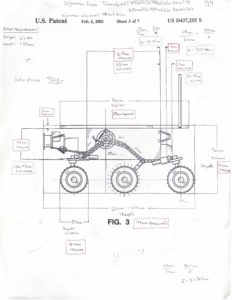
The size of the Mini Pathfinder will be determined by the size of the 3DoT board. The chassis should the the minimum size needed to encompass the 3DoT. Since the 3DoT has dimensions of 70mm in length and 35mm in width, we used this as part of the basis of our calculations. The other part of the calculations that we used are from the measurements from the patent drawings.

Calculations

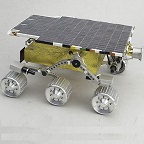
The Sojourner rover patent files were found online and printed out. The drawings were measured and compared to the dimensions of the Sojourner rover found online. The measurements taken from the drawings were very close in proportion to the given dimensions of the Sojourner rover. The length and height of the Sojourner rover is 65cm x 30cm (650mm x 300mm) which gives a ratio of 2.167. The measurements of the drawing gave a length of 139mm and a height of 63mm which gives a ratio of about 2.21. This gives an error of about %2 ( [(2.21-2.167)/2.167] * 100% ≅ %2). Since only the overall dimensions of the Sojourner rover could be found, we used these patent drawings for the basis of our scaling of the electronics box (chassis). Comparing the given length of 650mm to the measured length of 139mm gives a scale of 4.68 for the patent drawings. The electronics box length is measured at 68mm and height at 29mm, this gives a ratio of 2.34. If we apply the ratio above for length to height (2.34), then we get a height of 30mm. So for the total scale factor for our Mini Pathfinder chassis for the length and height will be 4.57. We use the measurements taken from the patent drawings and get a scale factor of 6.87 for the width of the Mini pathfinder from the calculated dimensions.
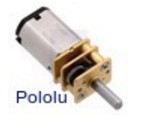
Figure 1. Patent Image Measured

Using these scale factors, we can determine the size of solar panel we need as well with 560mm/4.57 ≅ 122.5mm for the length and 360mm/6.87 ≅ 52mm for the width. The dimensions for the wheels of the sojourner are 130mm in diameter. Using the scale factor the diameter of the Mini Pathfinder is 130mm/4.57 ≅ 28mm.
Schematic

By Renpeng Zhang
Chassis Schematic

Schematic

Description

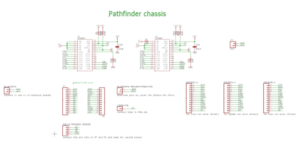
For the chassis eagle schematic, I choose to use two PCA9685 I2C expanders because one doesn’t have enough PWM pins for all our needs. We also used six VNH2SP30 motor driver for our motors. We use the PWM input from the I2C to the PWM pin in the motor driver. We left the shaft encoder pins on the second expander for the reading of the values for the RPM of the motor. We have left the pins for the current sensing on each of the motor driver so that they will be connected to the analog input of the Arduino to get the current of each motor.

Solar Cell Wire Layout

By Edgardo Villalobos

Wire layout out for the solar panels.

Table of Contents

Top View

Bottom of panels

1.

2.

3.

Top Level


S17 Prosthetic Arm: Attachment Module Test

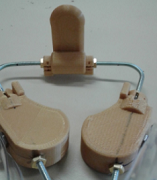
This is a test for a prosthetic arm attachment that only require’s straight forward attachment to the humeral bone of the customer instead of the use of an uncomfortable over the shoulder strap piece.